DIY with LMP: Matzo Cover
Passover is less then two weeks away. As always I'm hosting a big seder and the planning is well under way. The menu is the easy part as it's a traditional meal including several family recipes that I make year after year. While the table is another story. I love creating a beautiful tablescape and this year I thought it would be nice to include something homemade. So I crafted a Matzo Cover with this beautiful fabric that I found from Minted.
Supplies: - Fabric (this print and more here) - Scissors - Fabric Glue - Grosgrain Ribbon - Ruler - Pencil Steps:
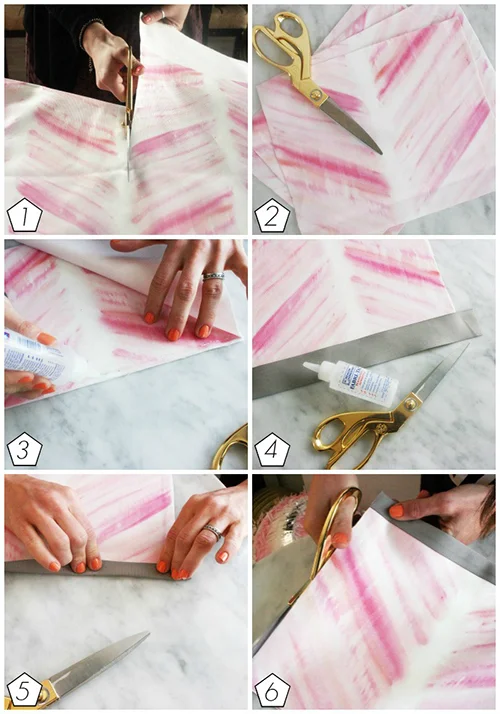
1. Using your ruler and pencil, measure out and mark four 10" x 10" squares on your fabric. Use your scissors to cut out each square following along the pencil markings that you have drawn.
2. Align three of your fabric squares, one on top of the other, with the printed side of the fabric facing up.
3. Take your fourth square and flip it so the printed side is facing the opposite way, and place this square at the bottom of your stack and align with the rest of your fabric squares.
4. Using your fabric glue, glue 3 sides of your aligned squares together, leaving 1/4 inch between the glue line and the edge of the fabric so you can go back and trim the squares later if necessary. Make sure to glue each separate layer together. Use your fingers to apply pressure and secure along each side that you have glued.
5. Take your grosgrain ribbon and cut a 12-inch long piece. Apply a thin line of glue to the top of your piece of ribbon and place along the middle, glued side of your fabric squares, leaving half of the width of the ribbon free to fold over and glue to the other side of the square. Apply a thin line of glue along the opposite side of the square from where you just glued, fold your ribbon over and apply pressure with your fingers to secure.
6. Use your scissors to trim or remove any excess or uneven fabric.


