Stained Glass Menorah Craft
Last month, I had the pleasure of finally meeting all of Seri’s AMAZING family in Toronto. Although her cousins Daniella and Jesse make regular visits to the city, I hadn’t met the rest of the famous Canadian crew. I was able to specifically bond with Seri’s Aunt Marissa over our love for crafts!
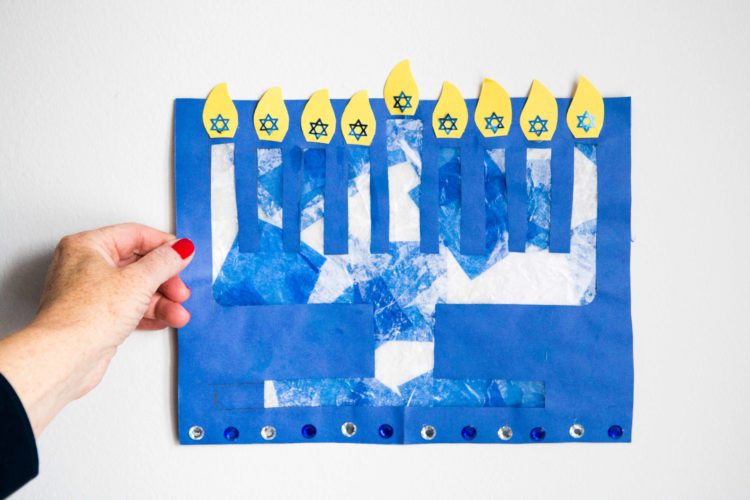
She showed me how to make this adorable stained glass menorah, a perfect kids craft project for Hanukkah!
Here’s what you’ll need:
1. White Glue
2. Mod Podge
2. Paint Brush
3. Adhesive Jewel Stickers
4. White and Blue Tissue Paper (Cut up in squares. The younger the child, the larger the squares!)
5. Wax Paper
6. Star of David Confetti
7. Blue and Yellow Construction Paper
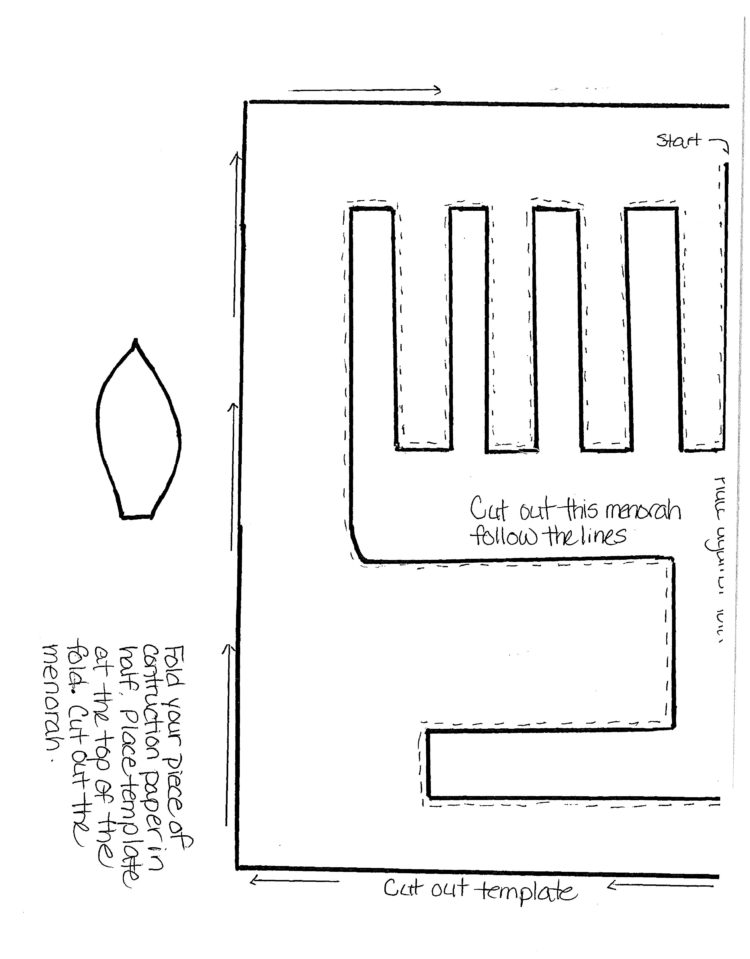
Step 1: Cut out Marissa’s template, take a piece of blue construction paper, fold it in half. Place the template against the fold and trace it onto the construction paper. Cut out the menorah.
Step 2: Take a piece of waxed paper that is larger than your menorah frame. Use a larger paint brush to cover the waxed paper with white glue.
Step 3: Stick the tissue paper squares onto the waxed paper.
Step 4: Allow the tissue paper to dry for a bit and then take Mod Podge and paint it carefully over the tissue paper. Make sure to paint the podge right to the edges of the waxed paper.
Step 5: Carefully take your menorah frame and place it down over the tissue paper making sure that you fit it so that the tissue paper is beneath the cut out of the menorah. Press down gently and let it dry.
Step 6: After it is dry, cut off the edges of the waxed paper.
Step 7: Cut out candle flames (using the template) and place them on the frame on the top of each candle.
Step 8: Add embellishments such as glitter, stick on jewels, Star of David etc.
Biggest thanks to Marissa for sharing her amazing crafting skills with us!


